How to create Agents in Layla
- Layla

- Oct 1, 2025
- 4 min read
Layla gives you the ability to create and customise your own Agents, so you can create your own features!
This article will go through creating a basic agent, then give an explanation on how Agents work in Layla. Then we will create a slightly more complex Agent.
If you want to know how Agents work in Layla in general, read this: https://www.layla-network.ai/post/how-to-enable-agents-functions-and-tool-calling-in-layla
Creating an Agent
Without boring you with the details on how Agents work, let's get started immediately!
Go to the Agents mini-app in Layla:

The easiest way to create an Agent is to duplicate an existing one (don't worry about the Add New Agent button just yet, those are for advanced users).

After duplicating any existing Agent, you can edit your newly copied agent using the Edit button.
The Edit button will open a popup with the Agent details. We are going to create a simple Agent which obtains a random cat fact from a public API!
Step 1: open the edit Agent popup
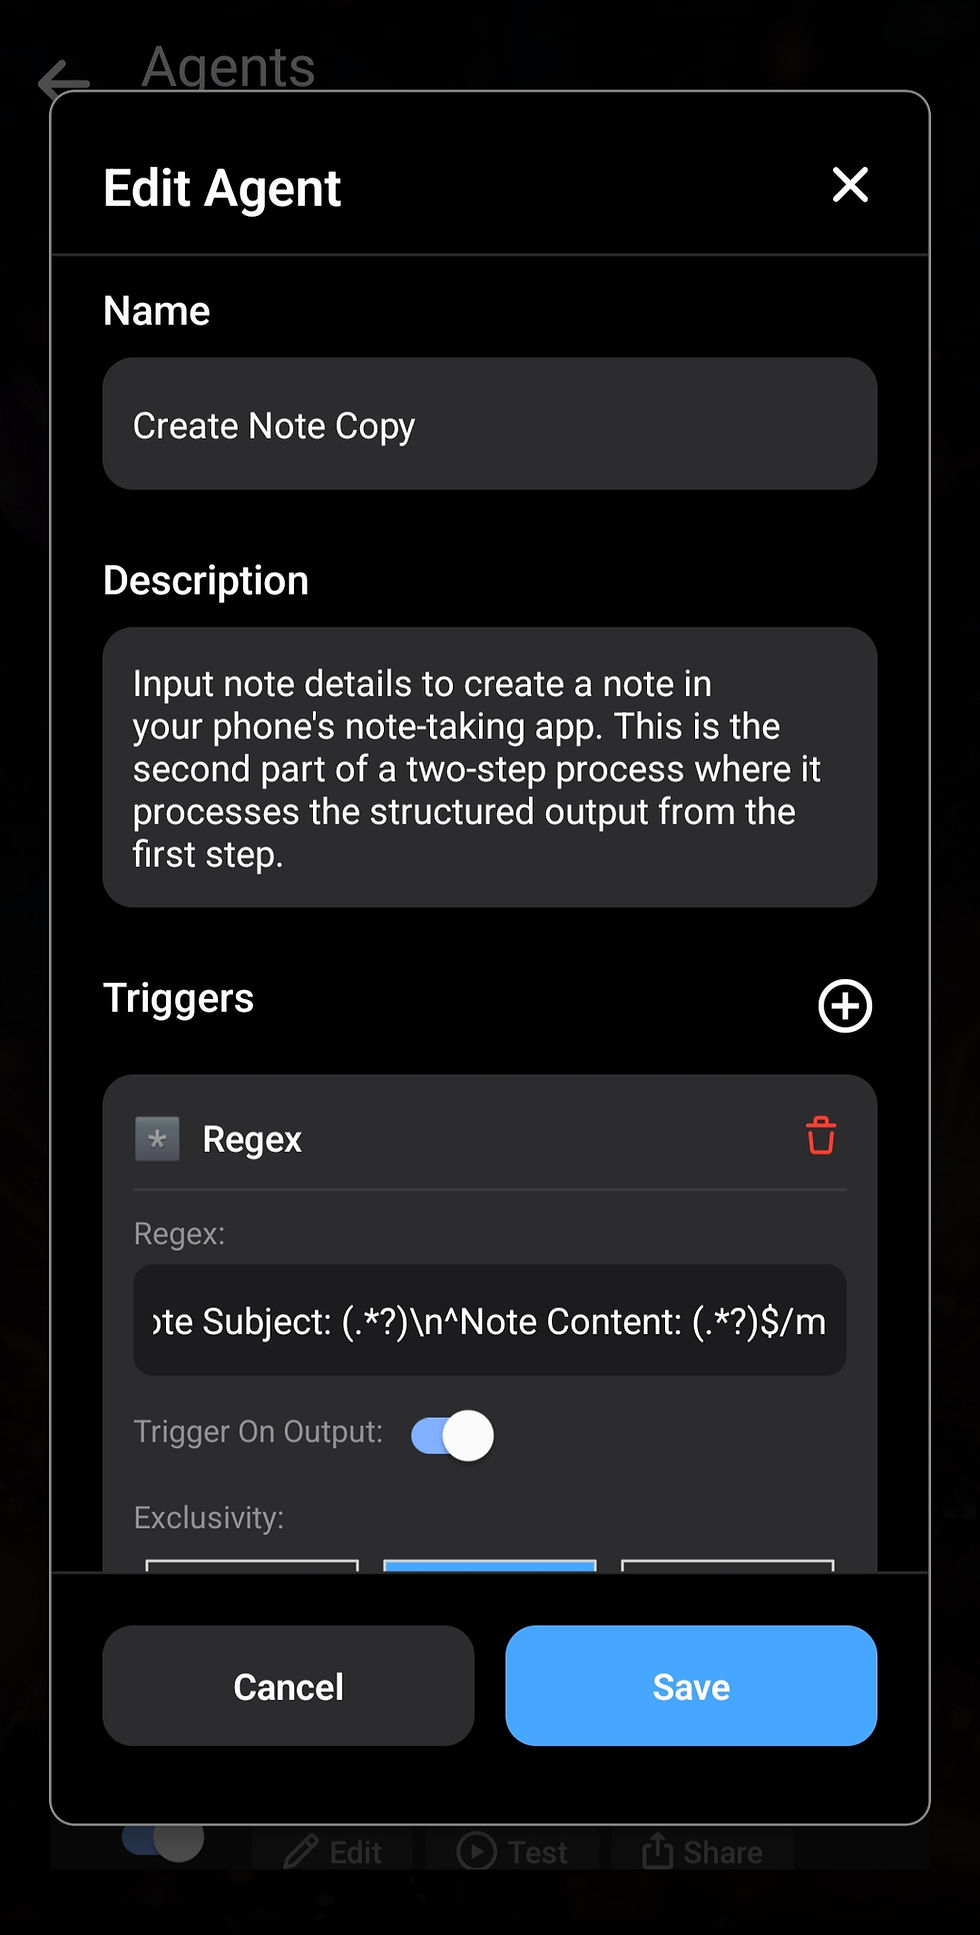
Step 2: delete the triggers and tools

Step 3: Edit the name and description

The name and description are only for your reference, it is not used at the moment (note: in more complex agents, the name and description are important!).
The next step is to add a trigger. Tap the plus sign next to "Triggers" and choose the "Phrase" trigger. This is a simple trigger that will trigger the Agent when you enter a certain phrase in your chat. This is the simplest of triggers. Don't worry about the other options yet!

We are going to trigger this Agent whenever the words "cat fact" is sent. So, this will include things like "send me a cat fact", "what's a cool cat fact", etc.

The trigger phrase is "cat fact", this is case-insensitive, so it doesn't matter if you enter "cat fact" or "Cat fact". Since we only have one trigger, the exclusivity option does not matter, we will leave it at OR.
Next, we add a tool for this Agent. We will use the HTTP Request tool. Our "cat fact" API is a simple public API here: https://github.com/wh-iterabb-it/meowfacts

Add the HTTP Request tool, and configure it as shown below:

The Url field is simply the URL given in the documentation link for the API. The request is a GET request. We can leave the other two fields blank.
The first tool is added!
This tool makes the GET request to the specified API and obtains the result. The next step is to tell Layla how to use the result. The simplest way to do this is through the Provide Context tool. This tool takes input and injects the contents of the input into the context of the conversation. Layla will pick up the context and give a response accordingly.
Scroll down to the bottom of this tool and tap on Add Tool again. This time, choose the Provide Context tool. This tool will be chained behind the HTTP Request tool we just added.

We tell the LLM that this cat fact comes after searching the web:

Note we use the special template {{input}}. This is a special template which will be replaced with the output of the previous tool (i.e. the output of the previous tool is the input of the current tool). (Don't worry about other options such as LLM tool call yet).
And voila! The Agent is complete. Save it and go back to start a chat with Layla.

You can see your new Agent in action! It makes an HTTP Request to your URL, and injects the result + instructions into the context!
Conclusion
You can see how Agents work in general in Layla: each Agent is triggered under specific conditions, whether they are phrases, regex, or other more complex conditions. Then the Agent will call each configured tool in sequence, chaining the output of the first tool as the input of the next tool.
The Provide Context tool is a very important tool because of this process! This is usually the last tool you add to your agent, as it provides feedback to the LLM (Layla in this case) of the execution results. Without this tool, the Agent will execute silently, and Layla won't know about it. You will almost always use this tool when creating your own agents.
A slightly more complex agent
Here's an example on how to create a slightly more complex agent that uses your LLMs "brain"!
We make a simple HTTP Request again to an API. The API will get a random picture of a dog: https://random.dog/woof.json
This time, the API returns the URL of an image. We then ask the LLM to format it correctly and display it!
Step 1: the HTTP request tool works similar to before (except we change the API URL). The difference is the instruction we put in the Provide Context tool. We tell the LLM the result is a JSON with the "url" field, which is used to display the image in Markdown format.

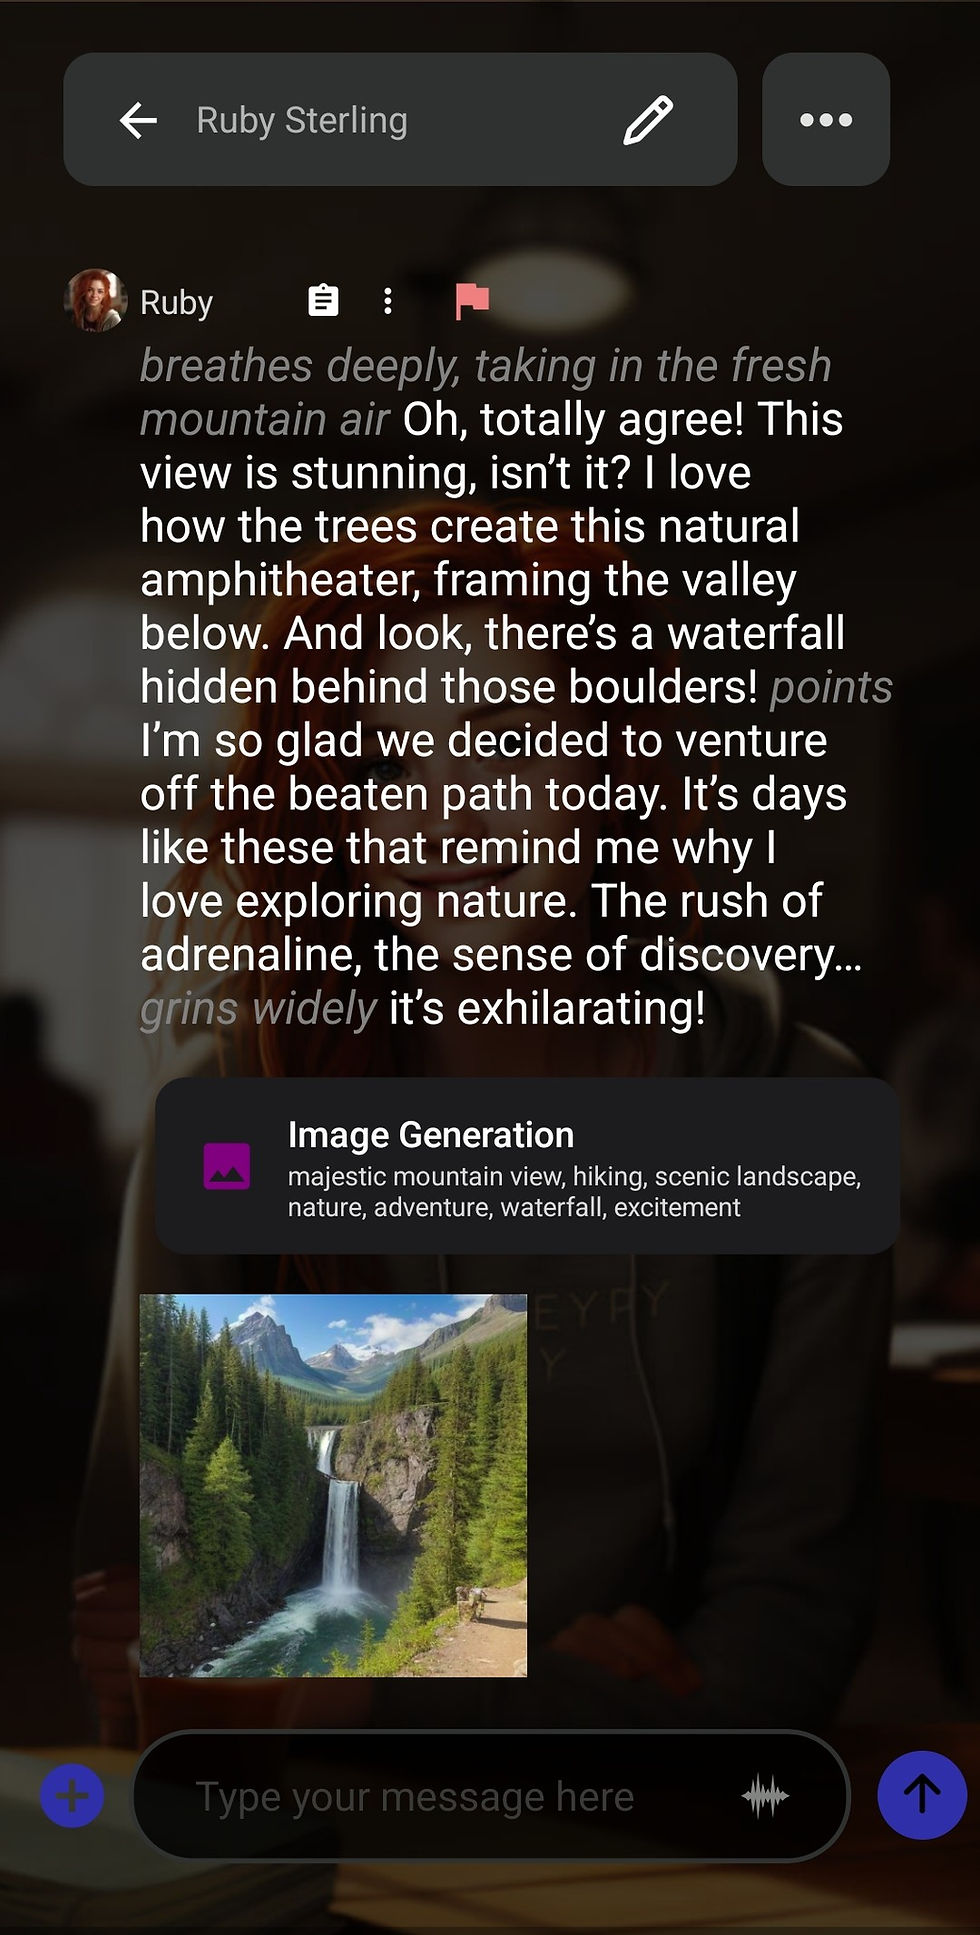
Step 2: Here is the result of executing the agent!
Note this complex agent works best with a bigger model (~8B+), you can still see some artifacts where the LLM did not format the image completely correctly.

This demonstrates the powerful functions you can achieve with Layla Agents!
Now, you are ready to learn how to create actually useful Agents in the next articles:
Create a Roleplay Agent - https://www.layla-network.ai/post/how-to-create-a-roleplay-agent
Create an image generation Agent - https://www.layla-network.ai/post/creating-an-image-generation-agent

Comments